I used to wonder why my designs fell flat. That frustration made me look for a way to stand out. Then I found a proven method for creating unique challenge coins. Now I help others unlock that same excitement.
Design a challenge coin by choosing a specific theme, selecting a shape and size, then deciding on metal plating and enamel colors. Draft a simple sketch, review proofs, and make revisions. Finalize a sample, then approve mass production for a professional, high-quality result.
I remember my first attempt. I made lots of mistakes, but I learned. Let me share what works so you can skip those headaches. You will see how each step elevates your design.
Gather Your Ideas
I always begin with the core idea. I picture a theme, a message, and a purpose. That clear vision guides the entire process, from shape to color and beyond.
In this step, I define the overall concept. I think about the audience, the style, and the final use of the coin. I gather images and references, then draft a sketch to show the basic layout. That quick sketch might look rough, but it helps me imagine the front and back details. I also decide whether this coin is for a sporting event, a museum gift shop, or a special ceremony. Laying that groundwork means I have a roadmap for the final design. This approach saves me time and helps me keep track of requirements and client needs.
When I chat with buyers, I ask questions about the coin’s goal. Some want corporate logos. Others imagine scenic landmarks or popular mascots. I try to consider multiple angles. For instance, my company, INIMAKER, focuses on B2B wholesale coins for large buyers around the world. Our customers often want coins that highlight brand identity, event themes, or unique cultural icons. We draw quick sketches to show them different possible layouts. We might propose a design with a strong tagline on the front and a stylized date or motto on the back.
The Importance of Target Audience
I always see big differences in design expectations. Mark Chen, one of my recurring customers from France, often wants tourist-themed coins for scenic hotspots. He’s 50, confident, and direct. He cares about detail and fair cost. Other buyers want coins for corporate anniversaries. I highlight how a single theme can be adapted to different audiences. A corporate manager might want minimalistic shapes and cooler colors. A coin dealer might want bold fonts or historical images.
Tools for Inspiration
I rely on several resources:
- Google Images: Quick idea hunting.
- Pinterest: Trendy visuals and color palettes.
- Shutterstock: Stock artwork references.
- In-house sketches: Personalized doodles that show scale.
| Resource | Zweck | Nutzen |
|---|---|---|
| Google Images | Quick brainstorming | Fast, diverse references |
| Trend analysis | On-trend color combos and patterns | |
| Shutterstock | Royalty-free visuals | Quality images for reference |
| Sketches | Custom drafting | Brings personal ideas to life |
Sketching for Success
I learned that rough sketches reduce misunderstandings. Clients may not be artists, and neither am I. But a quick doodle helps them confirm text placement, alignment, and the look of logos. This step ensures I cover important details, from the brand’s color codes to their slogan. It also reminds me to keep track of all elements before I commit to the next phase.
Pick the Coin's Size and Shape
Once I know the concept, I finalize options like coin size, shape, thickness, and colors. Those decisions create a solid framework for production.

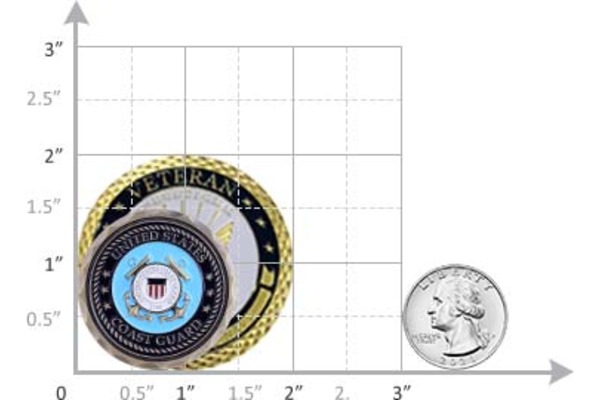
Here, I make decisions about the coin’s physical form. I decide if it should be a standard circular shape or a custom silhouette. I confirm the size, which often ranges from 1.75" to 2" in diameter. I think about whether to incorporate bottle opener features or cut-outs. Then I choose metal plating—often gold, silver, or antique copper—and consider thickness. A coin that’s 4mm thick feels heavier and more premium than a 3mm coin. At the same time, I check color compatibility so the plating and enamel shades don’t clash. These choices shape how the final piece looks and feels.
I find that size and shape influence a coin’s memorability. Sometimes, our B2B clients request large coins, up to 3" or even bigger, for major events. That can come with high costs, so I explain the budget implications. On the other hand, smaller coins of 1.5" are more portable. Mark Chen once requested an oval coin that showcased a French landmark. He also wanted enough space for layered text. That inspired me to think about the shape as part of the storytelling.
Balancing Weight and Texture
Coins can weigh more if we increase thickness. A heavier coin can feel more prestigious. Some corporate buyers prefer that heavier feel. Others want a simpler, lightweight option. I also explore 3D embossing. That deeper sculpting effect can show more intricate shapes, like animals or building facades, but it takes more time and cost to produce.
Choosing the Right Metal
Different metals shift the mood of a coin. Shiny gold looks elegant, but can reflect a lot of light. Antique silver can highlight tiny details. Black nickel plating with bright enamel pops under direct light. I learned that matching the metal to the brand image is crucial. If a buyer wants a classic aesthetic, antique copper might be perfect. If they want modern flair, high polish silver might feel sleek.
Edging and Unique Additions
Sometimes, a special edge like cross-cut or rope-cut draws curiosity. When potential clients hold the coin, they feel those edges and become more engaged. Including bottle opener hooks or multi-tool features is a fun addition, though it requires careful planning. Edges also provide an extra tactile layer. Some of my museum or travel company clients love a puzzle-like edge that complements the theme of the exhibit or city landmark.
| Key Design Choice | Possible Variations | Considerations |
|---|---|---|
| Größe | 1.5" bis 3" or larger | Budget, visibility, portability |
| Shape | Round, oval, custom silhouettes | Theme alignment, tooling complexity |
| Metal Plating | Gold, silver, copper, nickel, black | Brand identity, color harmony, brightness |
| Dicke | 3mm (standard) or 4mm+ | Weight, cost, premium feel |
| Edge Style | Flat, cross-cut, rope-cut, oblique | Handling, aesthetic, tactile engagement |
| 2D vs. 3D Artwork | Flat vs. sculpted | Complexity, cost, depth of detail |
Work on Artwork Proofs
When I’ve locked in the look and specifications, I request artwork proofs from my design team or handle them myself. This step leads to crucial adjustments.
Now, I assemble everything I’ve decided so far into a digital or hand-drawn proof. This includes final plating colors, enamel selections, text, and shape. Once I have that proof, I share it with the client. We refine elements like font size, alignment, background textures, or color palette. Sometimes, a design looks perfect on paper but needs small tweaks for production. The proof stage helps everyone see how the coin will appear in real life. Because I do B2B wholesale, I might scale these checks across multiple orders. It’s easier to fix problems now than after production starts.
I believe in extensive communication. For example, if Mark Chen wants a coin that resonates with French tourists, I might add a phrase in French or incorporate a subtle fleur-de-lis. This is the point where Mark reviews the proof and notes any changes. Maybe the text is too small, or the enamel color is off. If that happens, I revise and send a new proof. That back-and-forth ensures we avoid the biggest pitfall: costly mistakes in final manufacturing.
Artwork Revision Cycles
My company, INIMAKER, offers unlimited revisions for potential clients. This matters in B2B because corporate buyers might need the legal department’s sign-off, or a branding committee’s approval. I adjust logos to meet brand guidelines, or shift Pantone colors to match official color codes. If Mark Chen decides the outline shape should be more rectangular, I incorporate that feedback. These steps keep the process transparent.
Common Proofing Challenges
Sometimes, text wraps awkwardly if there’s too much information in a small area. Or the color combinations create eye strain. I once tried to fit three paragraphs of text onto a 2" coin for a museum event. That design looked too busy. I learned that less is often more. Quality control at this stage is vital. I consider how each color interacts with the metal finish. For instance, bright red can pop against black nickel, but might become washed out against antique copper.
Collaboration With the Design Team
I share proofs with a dedicated design team. They confirm each detail meets production requirements. If the lines are too fine, we scale them up so the mold can capture the details. This is where real synergy happens. I rely on their expertise to refine my original concept.
Approve the Sample Coin
After client approval, we produce a sample. That piece is our final checkpoint before mass production begins.

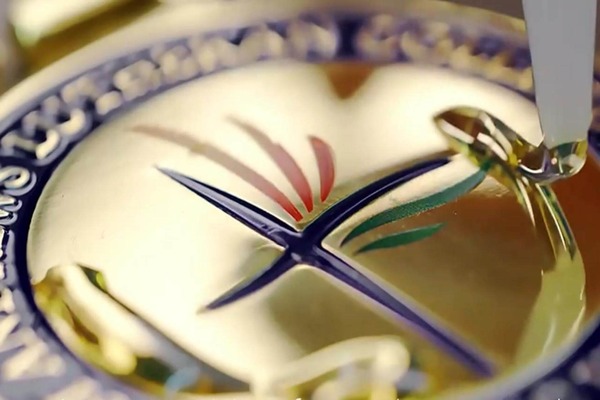
In this phase, I watch the creation of a physical sample. Our machines craft the mold, plate the coin, and fill the enamel areas. Once the plating and colors are set, the coin is polished and inspected. I confirm weight, edging, shape, and color accuracy. If everything meets our standards and the client’s needs, we move on to full production. If not, I circle back with revisions. This ensures consistency for the entire order, whether I’m making 100 coins or 10,000 coins. During this step, communication remains crucial. I share pictures, or even ship the sample to the client.
Sampling is when the coin shifts from concept to tangible object. I believe in thorough checks for alignment, color bleed, or plating inconsistencies. At INIMAKER, we have four production lines in China. We handle multiple projects at once. Each line ensures that the coins match the sample’s quality. This method reduces errors that might appear when mass-producing thousands of pieces. Because our main buyers are in the United States, Russia, France, the United Kingdom, and other European and American countries, we maintain strong quality control to satisfy diverse demands.
Quality Control Steps
- Visuelle Inspektion: I compare the coin with the final proof.
- Plating Check: The metal tone should be uniform.
- Enamel Check: Colors must be correctly filled and cured without bubbles.
- Measurement: I confirm diameter and thickness.
- Edge Verification: Unique edges match the requested style.
- Logo and Text: Spelling, spacing, and clarity.
Collaboration With Logistics
I’ve learned that timely delivery is crucial, especially for people like Mark Chen. He hates missing sales windows in peak tourist seasons. I arrange reliable shipping methods, handle certifications if needed, and stay proactive with paperwork. This includes preparing customs documents to avoid delays. I also handle payment details through channels like Alibaba or direct wire transfers, depending on the client’s preference. Since I serve B2B clients, these factors keep the supply chain smooth.
Handling Potential Revisions
Sometimes, the sample reveals a small flaw. Maybe a portion of the enamel is too light. I go back to the plating stage or tweak the color mix. This step prevents mass production of flawed coins. It’s better to spend a little extra time here than rush ahead with mistakes. Once the client approves the sample, I proceed with large-scale output.
Move Into Final Production
After the sample gains approval, I transition to the bulk manufacturing phase. Here, every coin gets the same care, ensuring consistent standards.
This final stretch moves swiftly. Molds are replicated if needed, and our machines handle plating, die-striking, or stamping. The factory workers fill the enamel carefully, layer by layer if it’s a complicated design. Then the coins dry and pass a second quality check. I package them according to client instructions, often in individual poly bags or presentation boxes. Timing is vital, especially for large orders. I coordinate with shipping partners to make sure the coins arrive intact, usually ahead of the scheduled date.
I always reflect on how this final step can make or break customer satisfaction. Maintaining consistency across thousands of coins requires meticulous oversight. Each plating batch must match the approved sample. The staff measures color levels and plating thickness at intervals. Any discrepancy triggers a recheck. I remind them that one flawed batch can upset a large corporate buyer, or a museum gift shop that expects perfection.
Packaging Details
Some clients, especially those who target high-end collectors, prefer velvet pouches or acrylic cases. Others just want cost-effective packaging to keep the unit price low. Mark Chen once needed special packaging with a short French greeting inside. That small extra detail helped boost sales. Personal touches can set a coin apart, especially in tourist markets.
Verteilungskanäle
I also use various promotion channels. Alibaba listings connect me to global businesses looking for wholesale coins. Exhibitions and independent sites let me share product samples directly with potential buyers. This approach reflects how I build brand awareness for INIMAKER. By showcasing finished coins, I assure new contacts of our deep customization capabilities. That’s how we attract large corporate buyers, sporting goods chains, travel companies, museums, and coin dealers.
Customer Feedback Loops
Once shipments arrive, I appreciate feedback. Some prefer direct phone calls. Others send emails or reviews. If a client experiences shipping delays, I refine the logistics plan. If someone wants a bigger thickness next time, I note that for future orders. These continuous improvements keep me competitive in the B2B space and strengthen my relationship with returning buyers.
Abschluss
I guide ideas from a rough concept to a final challenge coin that meets high standards. It’s a journey of planning, design, revisions, and careful manufacturing. Each step ensures a result that stands out and meets the buyer’s needs.


